Software Architect
Implementing Azure Windows Virtual Desktop
The COVID-19 pandemic has been wreaking havoc since the beginning of the year and many companies have sent their employees home in an effort to try to control the spread of the virus. As a consequence, many of us have been implementing some form of telework from employees' own computers and internet connections, doing work limited to navigating a complex infrastructure with VPNs, private connections, cloud servers, and the list goes on.
This situation has been a driving force toward the accelerated improvements to the service known as Windows Virtual Desktop (WVD). This service has existed for some years now but it wasn't until 2020 that it achieved greater popularity. WVD is providing companies with the ability to securely allow employees to work remotely with an infrastructure that not only gives them their familiar tools such as Microsoft Office but directly connected to their office network. So it is just like everyone is using their office computers.
Let's examine how to implement a Windows Virtual Desktop infrastructure for your organization.
Infrastructure
The WVD infrastructure consists of three basic elements: Host Pools, Application Groups, and the Workspace.
Host Pools
A host pool is a collection of virtual machines that when added as part of the WVD environment become what is known as session hosts. For a virtual machine to register as a session host it needs to run the Windows Virtual Desktop agent. A host pool can be either Personal or Pooled. A Personal type host pool will assign a single session host to a user while a pooled host pool allows multiple sessions on a single session host. Pooled host pools are more cost-effective if you have many users but the case for a Personal type host pool can be justified for a user that requires a higher level of performance or security.
Each session host is domain-joined so it is managed like any other server in the Active Directory. You can apply group policies to them as usual.
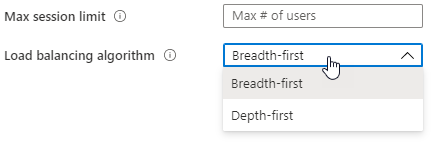
A host pool configured as Pooled uses a load-balancing algorithm to allocate sessions. There are two algorithms:
- Breadth-first - This algorithm allocates sessions across all available session hosts in an attempt to provide the best user experience.
- Depth-first - This algorithm allocates sessions that saturate a session host (to the maximum allowed) before moving to a new one. This is the choice for cost-conscious organizations as it maximizes the utilization of each session host.
A host pool configured as Personal can either automatically assign session hosts to users (determined by Azure) or directly (determined by the administrator).
Application Groups
An application group is a collection of applications a user is allowed to run. There are two types, RemoteApp and Desktop. The RemoteApp application group is a collection of applications such as the Microsoft Office Suite, while the Desktop application group grants access to the session host desktop.
By default, a Desktop application group is created when you create a host pool but you can remove it at any time. Note that you can only have one Desktop application group.
It is within application groups where you determine which users have permissions to access applications. It is recommended to create Azure AD groups for this purpose to make it easier to manage permissions for access.
Workspace
A workspace is a collection of application groups.
Users access WVD workspaces which allow them to run applications that in turn run on session hosts provided by host pools.
Requirements
The following list shows the licensing requirements based on what type of OS you want to deploy:
- Windows 7 Enterprise
- Microsoft 365 E3, E5, A3, A5, F3, Business Premium
- Windows E3, E5, A3, A5
- Windows 10 Enterprise or Windows 10 Enterprise multi-session
- Microsoft 365 E3, E5, A3, A5, F3, Business Premium
- Windows E3, E5, A3, A5
- Windows Server 2012 R2, 2016, 2019
- RDS Client Access License (CAL) with Software Assurance
For your infrastructure you need:
- An Azure Active Directory.
- An Azure subscription under the same Azure AD tenant.
- A Virtual Network that either contains or is connected to the Windows Server Active Directory or Azure AD DS instance.
- A Windows Server Active Directory in sync with Azure Active Directory. You can configure this using Azure AD Connect (for hybrid organizations) or Azure AD Domain Services (for hybrid or cloud organizations).
Creating a WVD Infrastructure
Before starting with the WVD Infrastructure, you need an Azure Active Directory, Subscription, Virtual Network, and Windows Server Active Directory. Many organizations already have their own Windows Server Active Directory. If this is your case, you can connect it to Azure AD using a tool called Azure AD Connect. If you don't have one, you can create an Azure Active Directory Domain Services domain that will connect to Azure AD.
We will discuss the configuration of these elements in a future post.
Host Pool
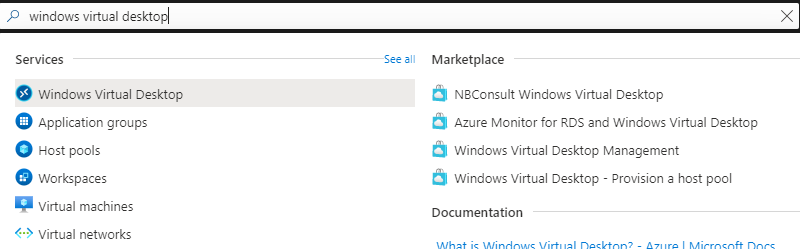
The first step in a WVD infrastructure is to create a host pool. In the Azure Portal, use the search at the top to look for Windows Virtual Desktop:
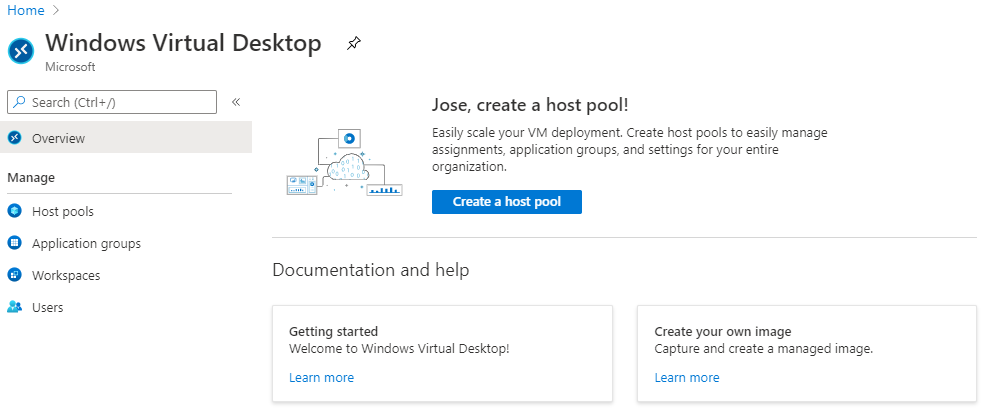
When you click on the first option you will be presented with the WVD overview. Then click on "Create a host pool".
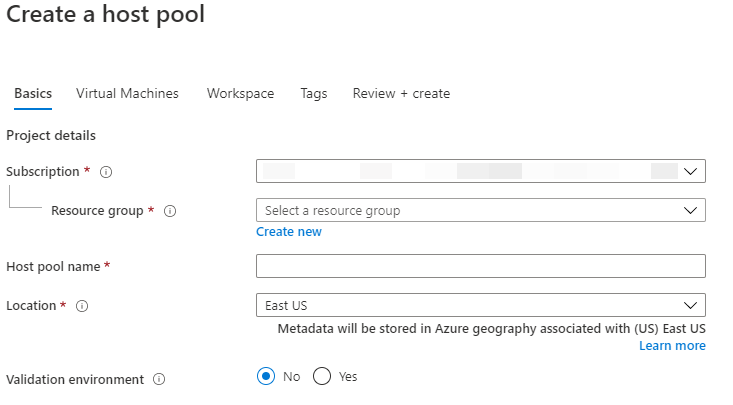
First, you need to select the Subscription, Resource group, and then give the new Host pool a name. Make sure you select a Location that is closest to your users to minimize network latency.
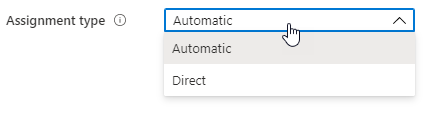
Now things get a little harder. You must select what type of host pool you want. Is it going to be Personal or Pooled? Remember that a Personal host pool will assign a session host to a user while a Pooled host pool will allow multiple user sessions per session host.

If you select a Personal host pool, select the type of assignment.
If you select a Pooled host pool you need to indicate the maximum number of sessions that each session host will be able to serve and the load balancing algorithm to use.
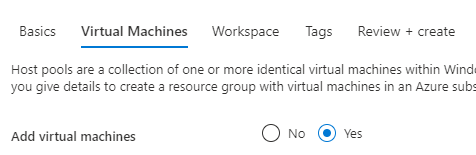
When all your selections have been entered, click "Next: Virtual Machines." This will take you to the next step where you can choose to add the virtual machines now or later. For our demo, we will choose "Yes" to add the virtual machines now.
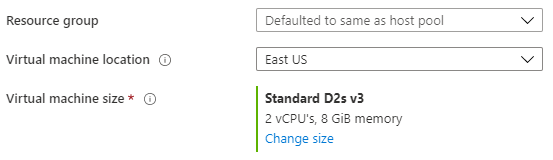
The first part of this section will let you select the resource group, location, and size of virtual machines.
Then there is a very important question. You need to tell Azure how many virtual machines you want. Note that all of the virtual machines will have the same size. Therefore you must determine beforehand, how many will be enough for your users to have a good experience and for your organization to be cost-effective.
According to Microsoft, there are four workload types that determine how to correctly size the WVD infrastructure:
- Light users doing basic data entry tasks
- Medium consultants and market researchers
- Heavy software engineers, content creators
- Power graphic designers, 3D model makers, machine learning researchers
Based on those workload types, for Pooled host pools, Microsoft recommends:
| Workload type | Maximum users per vCPU | vCPU/RAM/OS storage minimum | Example Azure instances | Profile container storage minimum |
|---|---|---|---|---|
| Light | 6 | 2 vCPUs, 8 GB RAM, 16 GB storage | D2s_v3, F2s_v2 | 30 GB |
| Medium | 4 | 4 vCPUs, 16 GB RAM, 32 GB storage | D4s_v3, F4s_v2 | 30 GB |
| Heavy | 2 | 4 vCPUs, 16 GB RAM, 32 GB storage | D4s_v3, F4s_v2 | 30 GB |
| Power | 1 | 6 vCPUs, 56 GB RAM, 340 GB storage | D4s_v3, F4s_v2, NV6 | 30 GB |
For Personal host pools, it will depend on what users will be doing but at the minimum they should have 2 vCPUs.
It is also necessary to specify the name prefix for the virtual machines. If for example your prefix is "wvd-vm" and you determine that 2 virtual machines is enough, they will be named "wvd-vm-0" and "wvd-vm-1".

The next set of questions have to do with the source image used to create the virtual machines. Note that while you can choose between Standard HDD, Standard, or Premium SSD, you can only use Managed Disks.
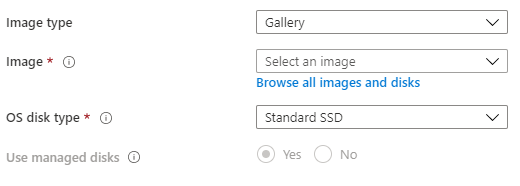
It is important to remember that by default, the portal will show you images from the Marketplace Gallery. However, you can also create and use your own custom image with all the required software (internally developed applications, ERP, etc.).
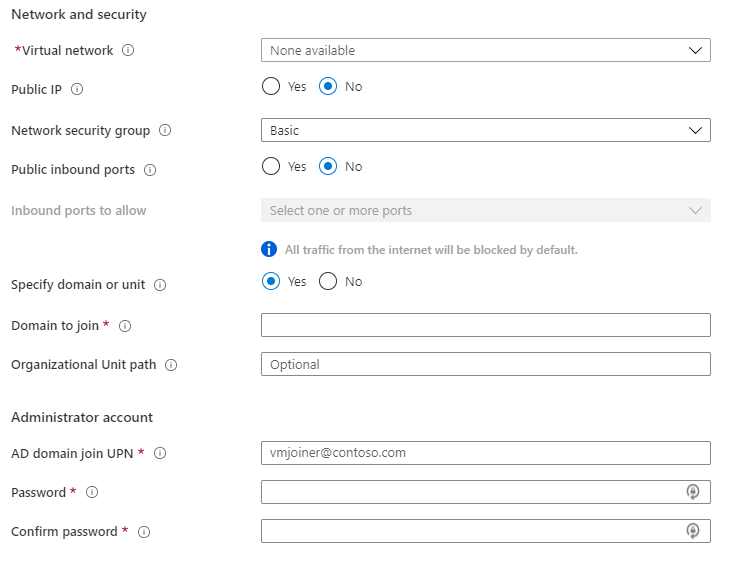
The final part of this section for virtual machines is the network and domain. Select the VNet from those available in your region (the portal will not give you the opportunity to create one). Next, choose whether the virtual machines will have a public IP (typically they won't) or not, then a network security group, and whether it will have inbound ports open.
Then enter the domain to join and the credentials of an account with permissions to add computers to the domain (typically an account in the Domain Admins group). It is not required to domain-join the virtual machines but if you don't do it now, you will have to do it later or your users will not be able to use WVD. It is unclear why Microsoft would even let you do that.
After all this information is entered, click "Next: Workspace" to go to the next step.
In the Workspace settings, you can choose to add a Desktop Application Group. If you choose not to add it, you can do so after the host pool is created.
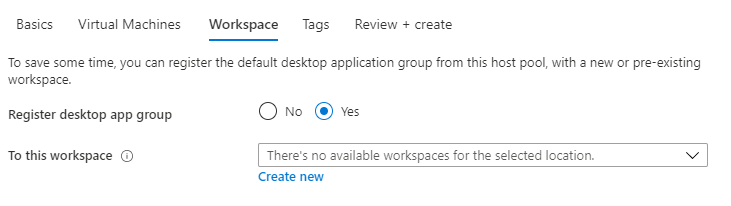
Remember that for users to have access to WVD they need at least one workspace and one application group with at least one application (or a Desktop application group). Then click "Next: Tags" to add Tags to the host pool. After you've added all your tags, click "Next: Review + create." When all validations are passed, click "Review + create."
This process will take several minutes. If you are creating a large number of virtual machines (this process can create up to 400 virtual machines) it could date a long time.
After the creation process is complete, you should have a fully functional host pool with at least one session host (virtual machine), an application group, and a workspace. Next, you will need to let your users connect to it. For that they need the Desktop Client which is available for Windows, Web, Android, iOS, and Mac.
The Windows client looks like this after it is installed.
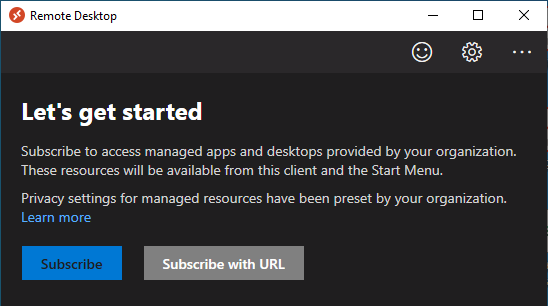
Click the "Subscribe" button and enter your Azure AD credentials. If you are replicating your Windows Active Directory to Azure AD they should be the same credentials you use regularly. Once you are authenticated, your workspace will look something like this (depending on the configured application groups).
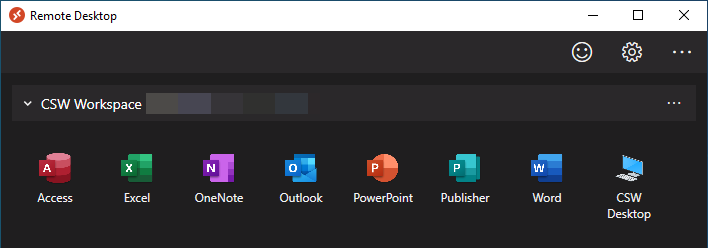
And that is it! You now have a fully functional Windows Virtual Desktop environment for your users. For more on WVD, contact us or check out our newsletter so you never miss a post about Azure cloud management:


About the author
Jose R. Guay